
TOP > How to use
How to use
The following is a brief explanation of the process from registration to use of YubiOn SecureFileTransfer.
Introduction Steps
【Operator: Sender】
-
Step 1: User registration
-
Step 2: Upload files
-
Step 3: Send download link
【Operator: Recipient】
-
Step 4: Download files
Step 1: User registration
Access YubiOn SecureFileTransfer new registration page. Please read "Notes before registration," "Privacy Policy," and "Terms of Use" and click the check button to agree to the terms. Click the "Next" button to continue.

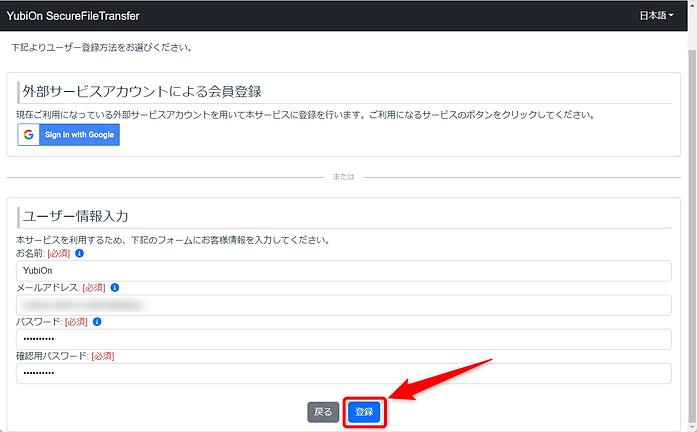
Enter your information and click the "Register" button.
* This time, we will explain how to register an e-mail address.
When a confirmation message appears, click the "OK" button. Upon completion of the temporary user registration, an e-mail confirming the e-mail address will be sent to the customer. Click on the URL in the e-mail to confirm your e-mail address.

When the login screen appears, enter your registered "e-mail address" and click the "Confirm" button.

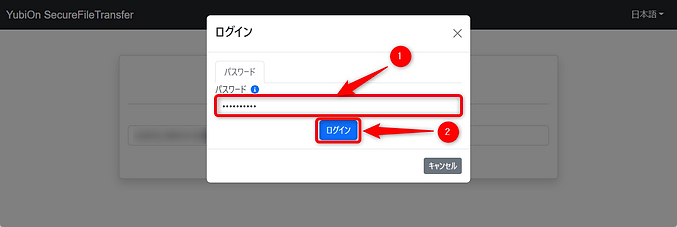
When the login modal appears, enter the "Password" and click the "Login" button.
After successfully logging in, the email address confirmation completion screen will be displayed. Once this confirmation is completed, the Service can be used.

Step 2: Upload files
Click on the "Upload" icon from the side menu on the left side of the screen.

Specify the From.
* The email address of the logged-in user is specified by default.

Check the "Unlimited" checkbox in the To item.
* This time, we will explain it in a format that can be downloaded by anyone who knows the download URL.
About the selection of To.
-
Unlimited: Anyone who knows the link can download it.
-
Only the specified mailaddress: Only people with the specified e-mail address can download the file.

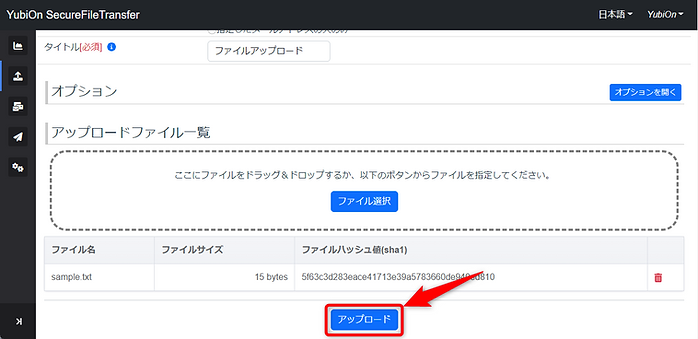
Enter the title.

Click the "Select File" button and select the file to upload.

When a file is selected, it appears in the list.
After confirmation, click the "Upload" button.
Click the "OK" button when a confirmation message appears.
When the upload is complete, the download URL will be displayed and should be noted.
Step 3: Send download link
Send the download link using email, chat, etc.
Step 4: Download files
The recipient clicks on the shared download link.
When the Received File Information screen appears, confirm the sender and click the "Download" button.

This is the process from registration to use.
The explanation here is in a format that allows anyone who knows the download URL to download the file, but it is also possible to request authentication when downloading by specifying the recipient.